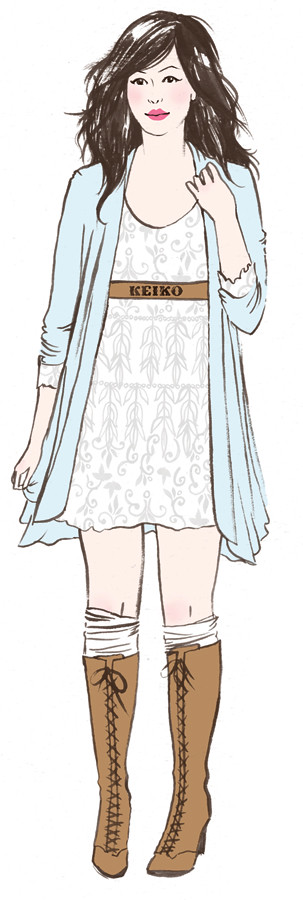
Thursday, June 30, 2011

Project DIY: How to Reupholster a Chair

Reupholstering furniture is not only a lot of fun, but also easier than it looks. Today we're going to show you how you can reupholster a chair with materials you probably already have in your house.


Materials:
Chair - we found ours on the side of the road
Old Shirt - we're using a thrifted shirt that just doesn't get enough love
Staple Gun - you can buy one for around $15
Screw Driver 
Pen
Scissors


Directions:
Step 1.
Gather all of the materials. Clean off chair.

Step 2.
Start by unscrewing the seat from the rest of the frame.

Step 3.
Using your screwdriver, carefully pry apart staples/studs holding together the old upholstery.

Step 4.
Place the seat face down on the fabric you are going to use to re-upholster. Draw an outline of your seat on the fabric giving yourself a 2 inch margin all the way around. Cutting outside the line, cut out the seat outline.

Step 5.
Choose the side you wish to start with. Pull the fabric tight and staple right in the middle of the chosen side. Moving to the left of your 1st staple, continue pulling the fabric tight and stapling at 1inch intervals, stop at the corner. Repeat on the right side of your initial staple stopping at the corner. Now repeat the process for the remaining 3 sides.

Step 6.
Carefully fold in the remaining fabric left around the corners and staple. Add extra staples to all sides to ensure everything stays put.

Step 7.
Screw on the top and pat yourself on the back, you've successfully re-upholstered your 1st chair.


xo,
Ruche

Project DIY: Summer Appetizer

Hi, everyone! It's Jen from Jen Loves Kev. I am super excited to share one of my new favorite recipes with you today. I love appetizers, but in the summer months traditional appetizers seem so heavy to eat. The thought of eating mozzarella sticks, potato skins, etc. in 90 degree weather just doesn't seem to go together. When I found this recipe for strawberry-kiwi summer rolls, I couldn't wait to try it out. It is perfect for summer eating. Enjoy!

Thank you for the amazing recipe, Jen! We can't wait to try it out ourselves. Ruche ladies, make sure you stop by Jen Loves Kev! You'll find more recipes, stylish fashion posts, motherhood musings, adventure, and more. ♥

xo,
Ruche

Wednesday, June 29, 2011

Wedding Wednesday: 4th of July

Planning a 4th of July wedding? An outdoor venue and simple decor is calling your name. Search vintage shops for unique accents and mix-and-match your patterns and textures. Decorate with vibrant reds, whites, and blues and add to the summer vibe with a soft yellow. Dress your wedding party in lightweight cottons, treat your guests to fresh lemonade, add a pair of red shoes and viola! ♥


Images via Style Me Pretty and Ruffled.
xo,
Ruche

Wedding Wednesday: Quirky Weddings We Love

There's nothing we love more than a whimsical wedding that embraces the quirky and unexpected. Here are two weddings bursting with originality and off-beat charm.

Embracing Color


In the Woods

(images via Green Wedding Shoes)

Monday, June 27, 2011

If Ruche were a pile of blankets...

Image via Pinterest
...we would look like this. ♥

xo,
Ruche

Picture This: How to Fake Lomo

Lomo refers to certain types of analog cameras that became popular in the 80s. Originating from Russia, the Lomo camera became popular for the deep saturation and vignettes that created quirky and offbeat images, and for it's "shoot from the hip" shooting technique.

Today we're going to show you how to make your photos look a la Lomo.

Step 1.

First we're going to create a vignette. Take the lasso tool and draw a circle around the main objects in your photo. Next go to Select > Inverse. Go to your Adjustment Layers icon and  add a Levels Layer. Slide the middle arrow towards the right up until you're satisfied. You will see the corners of your image become darker as you move the slider.


 Step 2.

Next go to Layers > Flatten Image. Next add a Curves Layer and create a slanted S shape on your curve. This will increase the contrast in your image. 


Step 3.


Now add Black Solid Color layer from the Adjustment Layer Menu. Set to Hue and adjust the opacity to below 50% (adjust to your liking).


Step 4.
The final step in this process is to sharpen the image. Go to Layers > Flatten Image.
Next go to Image > Mode > Lab Color. Switch over to the Channels view and select the Lightness channel. Now go to Filter > Sharpen > Unsharp mask. Set the Amount to 50%, Radius to 70-80, and Threshold to 0 (this is all up to you, so adjust until you're satisfied). Click Ok. Go to Image > Mode > RGB Color. Save.

Enjoy your cool new photo!


(tutorial sourced via Digital Photography School)


Learn more about Lomo photography here.

Saturday, June 25, 2011

Friday, June 24, 2011

Love Stories: Silly Situations

“I was nauseous and tingly all over. I was either in love or I had smallpox” – Woody Allen


I wish I could tell of you of a love that started out purely and classically romantic. But I can’t. No romance, no cute flirty sayings, just a girl who really needed to use the bathroom and a boy who just happened to be using it at the same time. Now you’re probably all wondering why I was in the men’s bathroom to begin with, but they were cleaning the women’s bathroom on my dormroom's floor and I thought I could sneak into the men’s bathroom quickly without anyone noticing. I pushed the bathroom door to go in and he pulled it from the other side to leave. I froze, stared at how cute he was for a second, and managed to stupidly blurt out, “I’m sorry. Can I pee with you?” Very classy, I know. He then said something like, “Uh... okay...” It was a little traumatizing to say the least.

As awkward as this encounter was, I’m glad that it happened. We shared a laugh at how awkward the situation was at our next run-in and it led to hello’s in the hallway, talks in the common area, and eventually walks around our campus and dates at the dining hall. Soon we were hanging out every chance we got and now four years later, we are still going strong and getting ourselves into as many silly situations as possible. We’ve had countless picnics in Central Park. We’ve watched too many marathons of House and Law & Order SVU. We’ve spent a ridiculous amount of hours walking around New York City. We’ve had our fights, cries, and laughs, but I couldn’t picture doing any of this with anyone else.

He is my best friend, my rock, and the person I want to spend the rest of my life with, god willing. We have been there for one another through endless amounts of finals, library days, and LSAT and GRE freak outs. We have graduated from our university and are in the process of getting our lives together, bit by bit. I will be starting law school in September and he will start going for his PhD a year from now. Though we will be farther away from one another, our love will always bring us together and I couldn’t have asked for a better man to spend these last crazy four years with. We’ll be starting a new scary journey, but I know we’ll be fine as long as we have one another… and lots of good food. We’re pretty big on eating. ♥


See the first Love Stories entry here! If you would like to submit your story, please send an e-mail to lovestories@shopruche.com. You may attach up to 5 photos, and we welcome creativity! Please try to keep your stories to a 1200 word limit. You will receive an e-mail when your story is selected. 

Thursday, June 23, 2011

Dive into a Summer Daze

Dive into a summer daze full of sunshine, celebrations, and relaxation. Soak up the summertime allure and shop the outfits inspired by every occasion. ♥

xo,
Ruche

Project DIY: Rustic Coasters

This is the perfect DIY project to do when you have no supplies and time to kill.


Materials:

*5/6 inch long twigs
*Twine


Instructions:
1. Clean up your branches and lay them out in the shape of your coaster.
2. Grab some colorful twine and cut 2 pieces that are about twice the length of your coaster.
3. Fold each string in half. Place a loop at each end of your 1st twig and tie two knots. Continue the process until all of your twigs are tied together.4. On your last branch, tie 4 knots and trim the twine

5. Enjoy your brand new coaster, (or mini raft as we like to call it)


(idea sourced from http://www.thursdaynightdinner.org/)

Wednesday, June 22, 2011

Wedding Wednesday: Photo Booths

Have some fun with your wedding guests! Photo booths are a great addition to a celebration, and they can bring tons of laughter and memories. Print the photos for a fun photo album or on the spot for keepsake wedding favors. ♥

Create the simple backdrop with paper or pretty fabric:

Purchase these adorable vintage-esk props from an Etsy shop, Little Retreats:

Or create your own with this DIY tutorial:

And don't forget the chalk boards!

xo,
Ruche

Wedding Wednesday: Creative Lighting Ideas

Planning a wedding can be incredibly overwhelming, even for the most inspired and organized bride. With so much to take care of and decide on, it's easy to get into a creative slump and even easier to overlook a crucial factor, like lighting.
But don't fret girls, we've got you covered. We've scoured the web and came up with our favorite lighting ideas.

Candle Centerpieces
Make every table glow by adding candles to compliment your flower arrangements. Or step outside the box and create an elegant centerpiece using only candles.


Paper Lanterns
Line your pathways with simple paper bag lanterns, or hang paper lanterns from the ceiling.

 Sparklers
Light up your exit with sparklers. Hand them out to guests during the reception for added photo fun.

(images via Pinterest)

Tuesday, June 21, 2011

Meet Keiko Lynn

Remember Keiko? We swoon over her vintage style and how she previously styled one of our crop tops and a pair of our oxfords. We're also in awe with her passion and talent for reconstructing clothes and her business savvy self. ♥ Enjoy the interview!

 Image by Alice Rutherford

Were you born and raised in Brooklyn?
I was born and raised in South Florida. I moved to Central Florida for college, and then to New York shortly afterward. I've been here for over four years and don't plan on leaving anytime soon, but I doubt I'll find myself retiring in Brooklyn. I have a little bit of country in me and would love to have my horses in my backyard at some point.

What’s a day in your life like?
I spend most of my day sewing and talking to my animals like a crazy person (I work from home). I blog and edit photos during breaks in my day, and always have music or tv on in the background. I watch an embarrassing amount of television while I'm sewing.

What do you love most about blogging?
Though it is primarily focused on personal style and general happenings in my life, I also use my blog as a platform for causes I truly believe in. I'm lucky to have extraordinary readers with big hearts. Together, we are making a difference, whether by raising funds or spreading awareness. Every little bit counts.

You mentioned that getting dressed everyday boosts your mood and helps you concentrate. How so?
When I'm dressed too comfortably or sloppily, I tend to get in a rut. All I want to do is relax or sleep! Since I work from home and I'm my own boss, I have to keep myself in check. Getting dressed up gets me in the right mindset.

What inspires your clothing line, Postlapsaria?
I had no intentions of working in fashion - I went to school for musical theatre. I always enjoyed expressing myself through my personal style and when I was in school, I was on a tight budget. I started reconstructing thrifted finds and pieces from my own closet. People started commissioning pieces from me and I decided to turn it into a business.

Any fun facts you’d like to share?
My favorite fun fact to share is that my mom's name is Barbie and my dad's name is Ken. People always think I'm fibbing, but it's absolutely true!

What items are on your Ruche wishlist?
This lace jacket is the perfect topper for summer dresses:
http://www.shopruche.com/lacey-lullaby-lace-jacket-p-7345.html?zenid23=1816be99a84c638db670bf4fc0cccb5e

I love the bright florals and flattering skirt of this trench:
http://www.shopruche.com/within-the-garden-walls-floral-trench-jacket-by-ark-co-p-7340.html

Blush pink is my favorite color to wear:
http://www.shopruche.com/make-me-blush-ruched-blazer-p-7332.html

This lace bralette would look great beneath a cutaway blouse:
http://www.shopruche.com/lacey-touch-scalloped-bralette-in-black-p-7249.html

A nipped in waist and full skirt is such a flattering silhouette:
http://www.shopruche.com/breakfast-in-bed-floral-dress-p-7228.html

I'm a sucker for lace, florals and feminine hues - can you tell?
 Thank you, Keiko! If you haven't yet, be sure to stop by her blog and her online shop for vintage style, beautiful makeup tutorials, thoughtful musings, and inspirations. ♥

xo,
Ruche